Set Up Reverse Proxy for Web Servers with IIS
09/13/2017
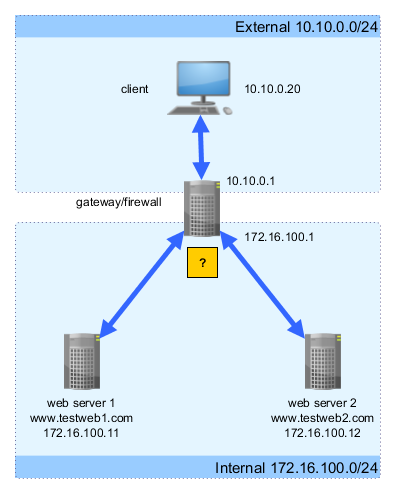
Problem
There are two web servers on two different machines in the internal network serving two different websites. Now we want clients from external network be able to access the two websites. However, there is only one available external IP address to be shared by these two websites. Also, we want the clients be able to visit the websites using the default HTTP port 80 instead of mapping different sites to different ports. The only thing that can distinguish the two websites’ requests is the url.
Goal
The two web servers, with IP address 172.16.100.11 and 172.16.100.12 in the internal network are serving www.testweb1.com and www.testweb2.com respectively with different contents. The only available external IP address is 10.10.0.1. When the client types www.testweb1.com or www.testweb2.com in the URL column in the browser, both will point to 10.10.0.1 by DNS record, but client will see different contents based on the URLs.
Solution
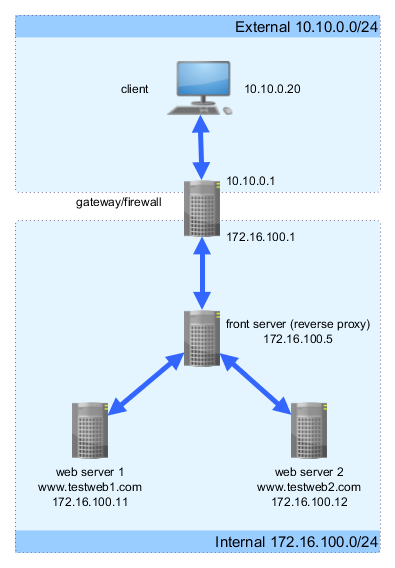
Use IIS to setup a reverse proxy server in the internal network, called front server. The front server can be visited from external network via NAT. The requests targeted for the two web servers will be processed by the front server first. The front server examines each request and redirect the request to the correct web servers based on the host information within the request headers.
Steps
1.In the internal network, set up an IIS server in addition to the existing two web servers. We will call it as front server.
2.Install two IIS modules for the front server: URL Rewrite and Application Request Routing.
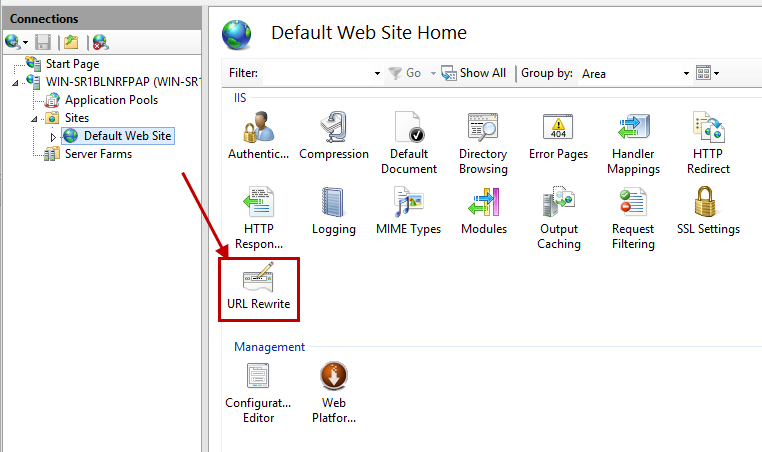
3.Open the IIS manager, select the default website, double-click the “URL Rewrite” module.
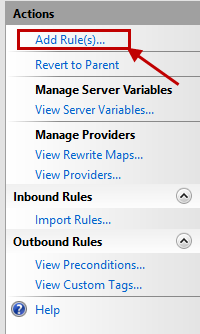
4.In the URL Rewrite page, find the right panel, click “Add Rule(s)…”.
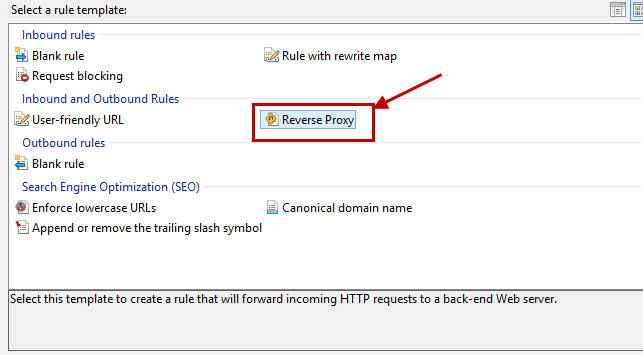
5.In the “Select a rule template” windows, choose “Reverse Proxy”, then click OK.
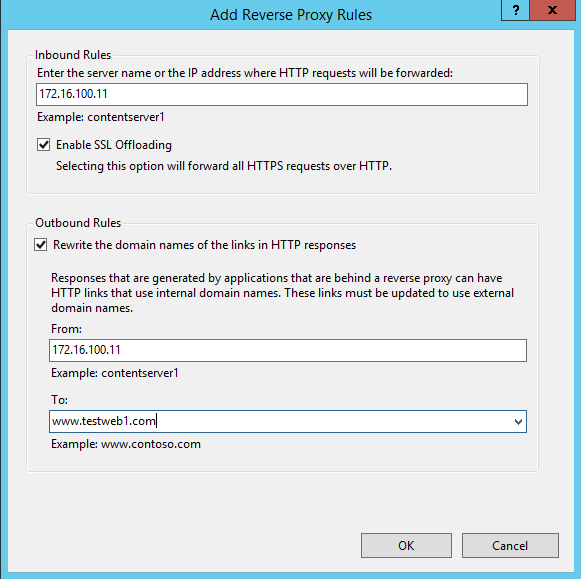
6.Next, the “Add Reverse Proxy Rules” window will pop up. Since we want to let 172.16.100.11 process all requests destined for www.testweb1.com, fill in the blanks like this.
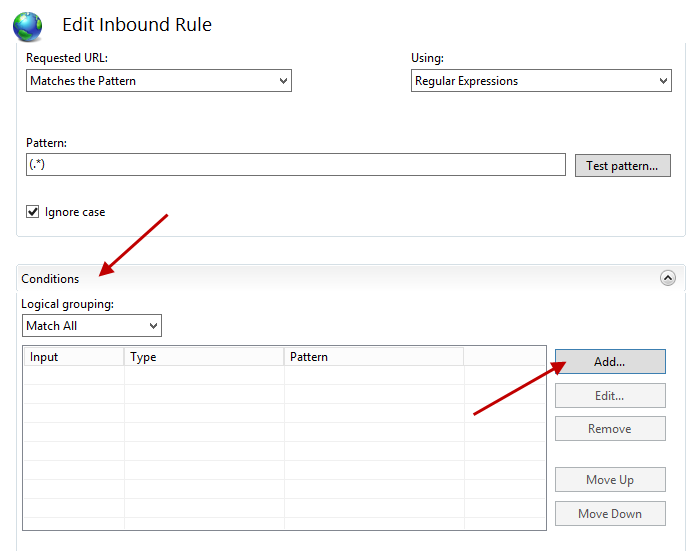
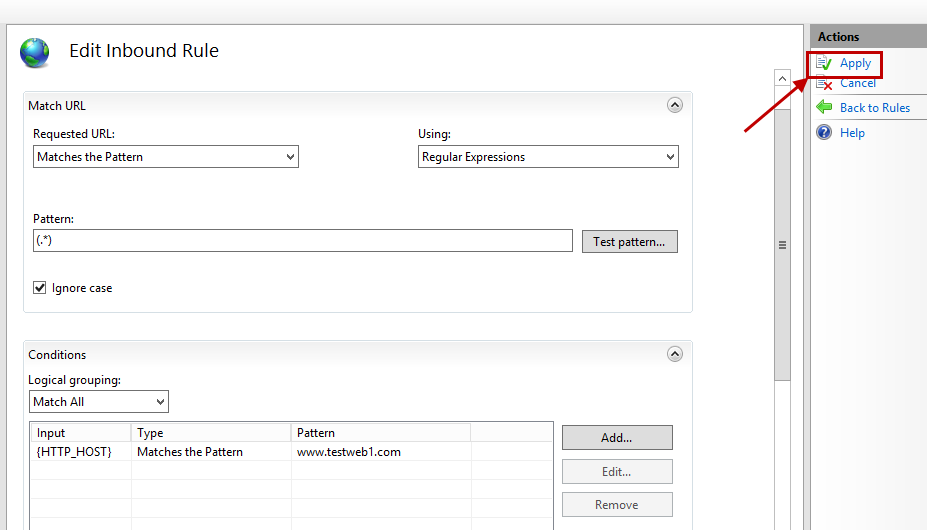
7.After the rules are applied, the reverse proxy should be working now. However, the front server is now redirecting ALL http requests to 172.16.100.11, which is definitely not what we want. To restrict it, we need to edit the inbound rule. In the list of inbound rules, select the rule just added, and click “Edit” to the right.

8.In the “Edit Inbound Rule” page, click “Conditions” to expand it, then click “Add” button.
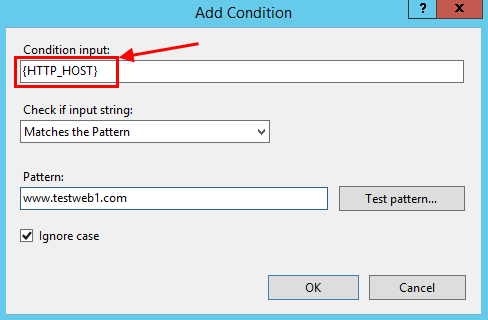
9.In the “Add Condition” dialog box, set the “Condition input” as “{HTTP_HOST} and pattern as www.testweb1.com.
10.After the condition is added, the Edit Inbound Rule page should look like this. Now only the inbound request for www.testweb1.com should be correctly redirected to 172.16.100.11. Click “Apply” to finish.
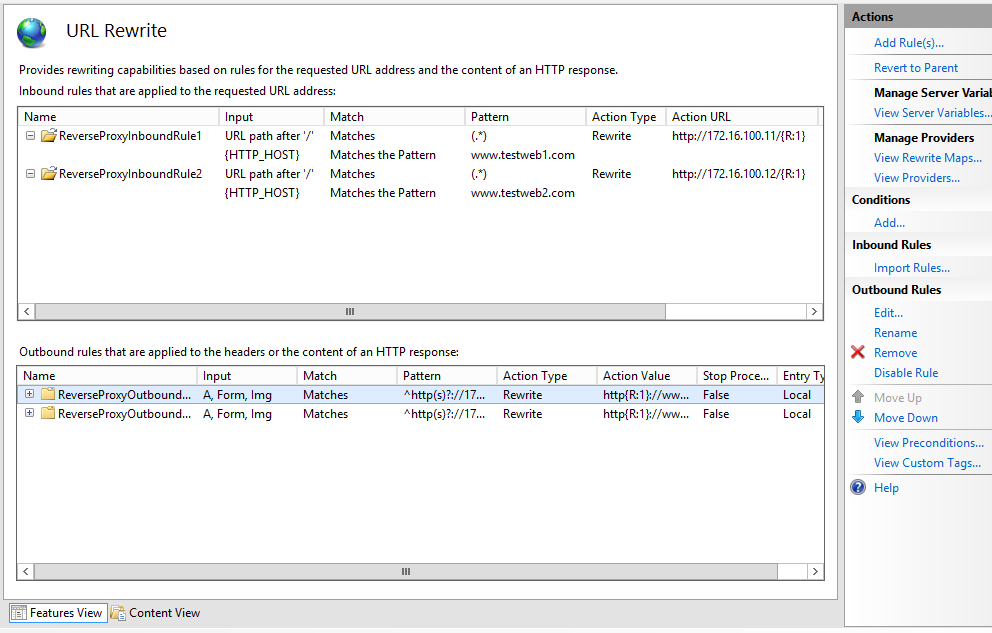
11.Repeat steps 4-10, but change the IP address and URL to 172.16.100.12 and www.testweb2.com respectively. After the rules are set, they should look like this:
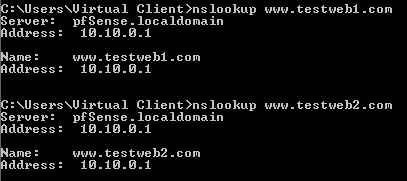
12.Now test with a client in the external network. Use a browser to access www.testweb1.com and www.testweb2.com (assuming that the DNS records have correctly mapped to 172.16.100.11 and 172.16.100.12 respectively), the correct web pages from web server 1 and 2 should displayed as we want.
(Both URLs points to the same IP address)

(Visit the IP address directly will load the web page from font server)
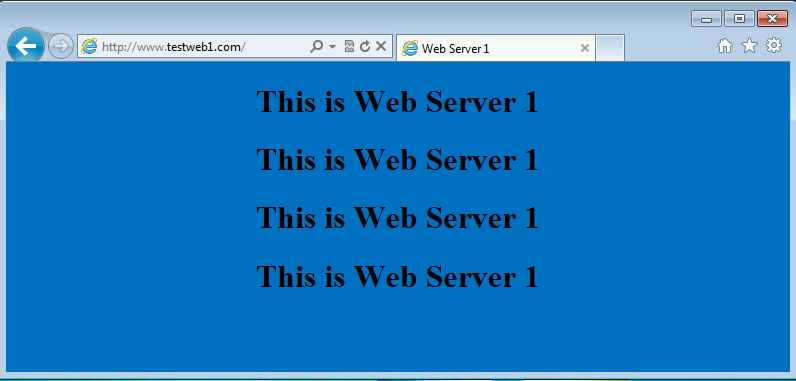
(Use URL www.testweb1.com will display web page from web server 1)
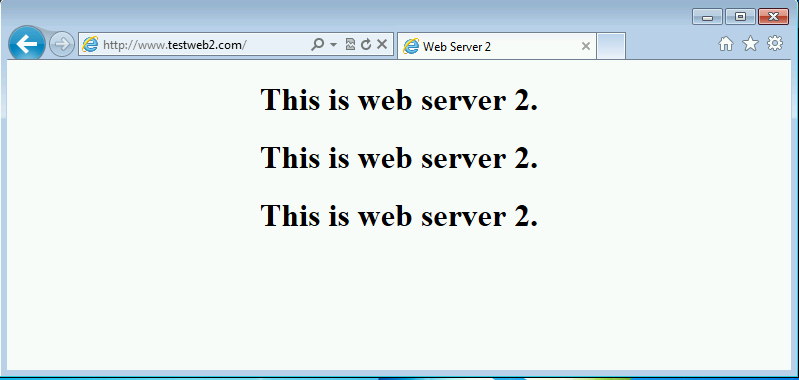
(Use URL www.testweb2.com will display web page from web server 2)